Directions
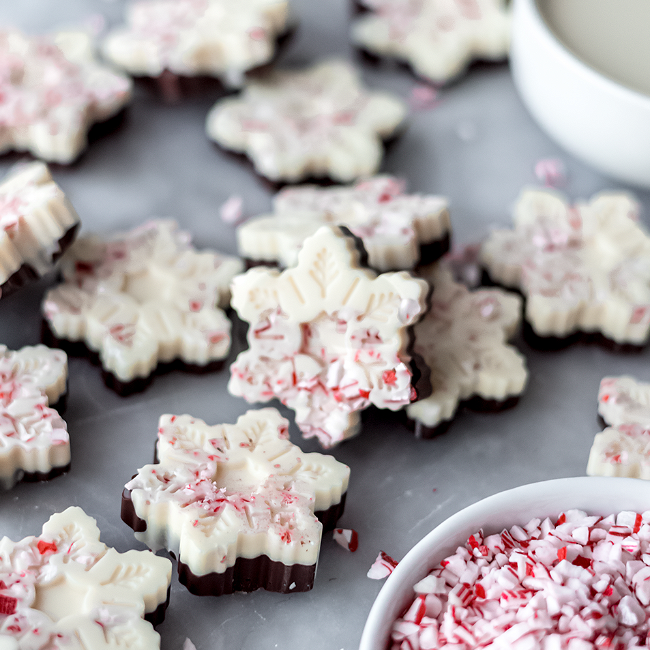
Spoon crushed peppermint into snowflake molds. Each mold will have around ¼ tsp. of crushed peppermint (more can be used if a strong peppermint flavor is desired).
Melt white confectionery coating in a microwave safe bowl. Melt the coating in 30 second intervals, stirring until fluid.
Place coating into a piping bag. Pipe over the crushed peppermint, filling each snowflake half full. If silicone mold is not filled to edges, gently tap the mold on the counter to settle the coating.
Temper your dark chocolate. Melt ½ of your dark chocolate in a microwave safe glass bowl in 30 second intervals. Melt until chocolate is fluid and reaches 113°F. Add in half of the remaining chocolate, stirring until it melts. Once combined, stir in the last of the chocolate until it melts. Chocolate temperature should be between 90-94°F after all chocolate has been incorporated.
Put dark chocolate into a piping bag. Pipe over the white confectionery coating. If silicone mold is not filled to edges, gently tap the mold on the counter to settle the coating.
Allow snowflakes to harden at room temperature for 20 minutes. *See recipe notes
Remove snowflakes from mold and enjoy! **See recipe notes for storage instructions.
Recipe Note:
*Chocolate does not need to be placed in the refrigerator, snowflakes should firm up in 20 minutes under normal room conditions.
**Store snowflakes in an airtight container or wrapped in foil. The shelf life for these confections is 9 months.
Want to see more of Hannah's innovative confectionery recipes? Check her out on Instagram @onesweeetmama, or visit her blog for more scrumptious recipes, scientific candy facts and more!
Have a recipe you'd like to share? We'd love to see your sweet style! Tag us on social @ifiProvisions with #PastryatHome for a chance to get featured across our social channels. Happy baking!


Leave a comment